Unraveling the Mystery: Candied vs. Crystallized Ginger
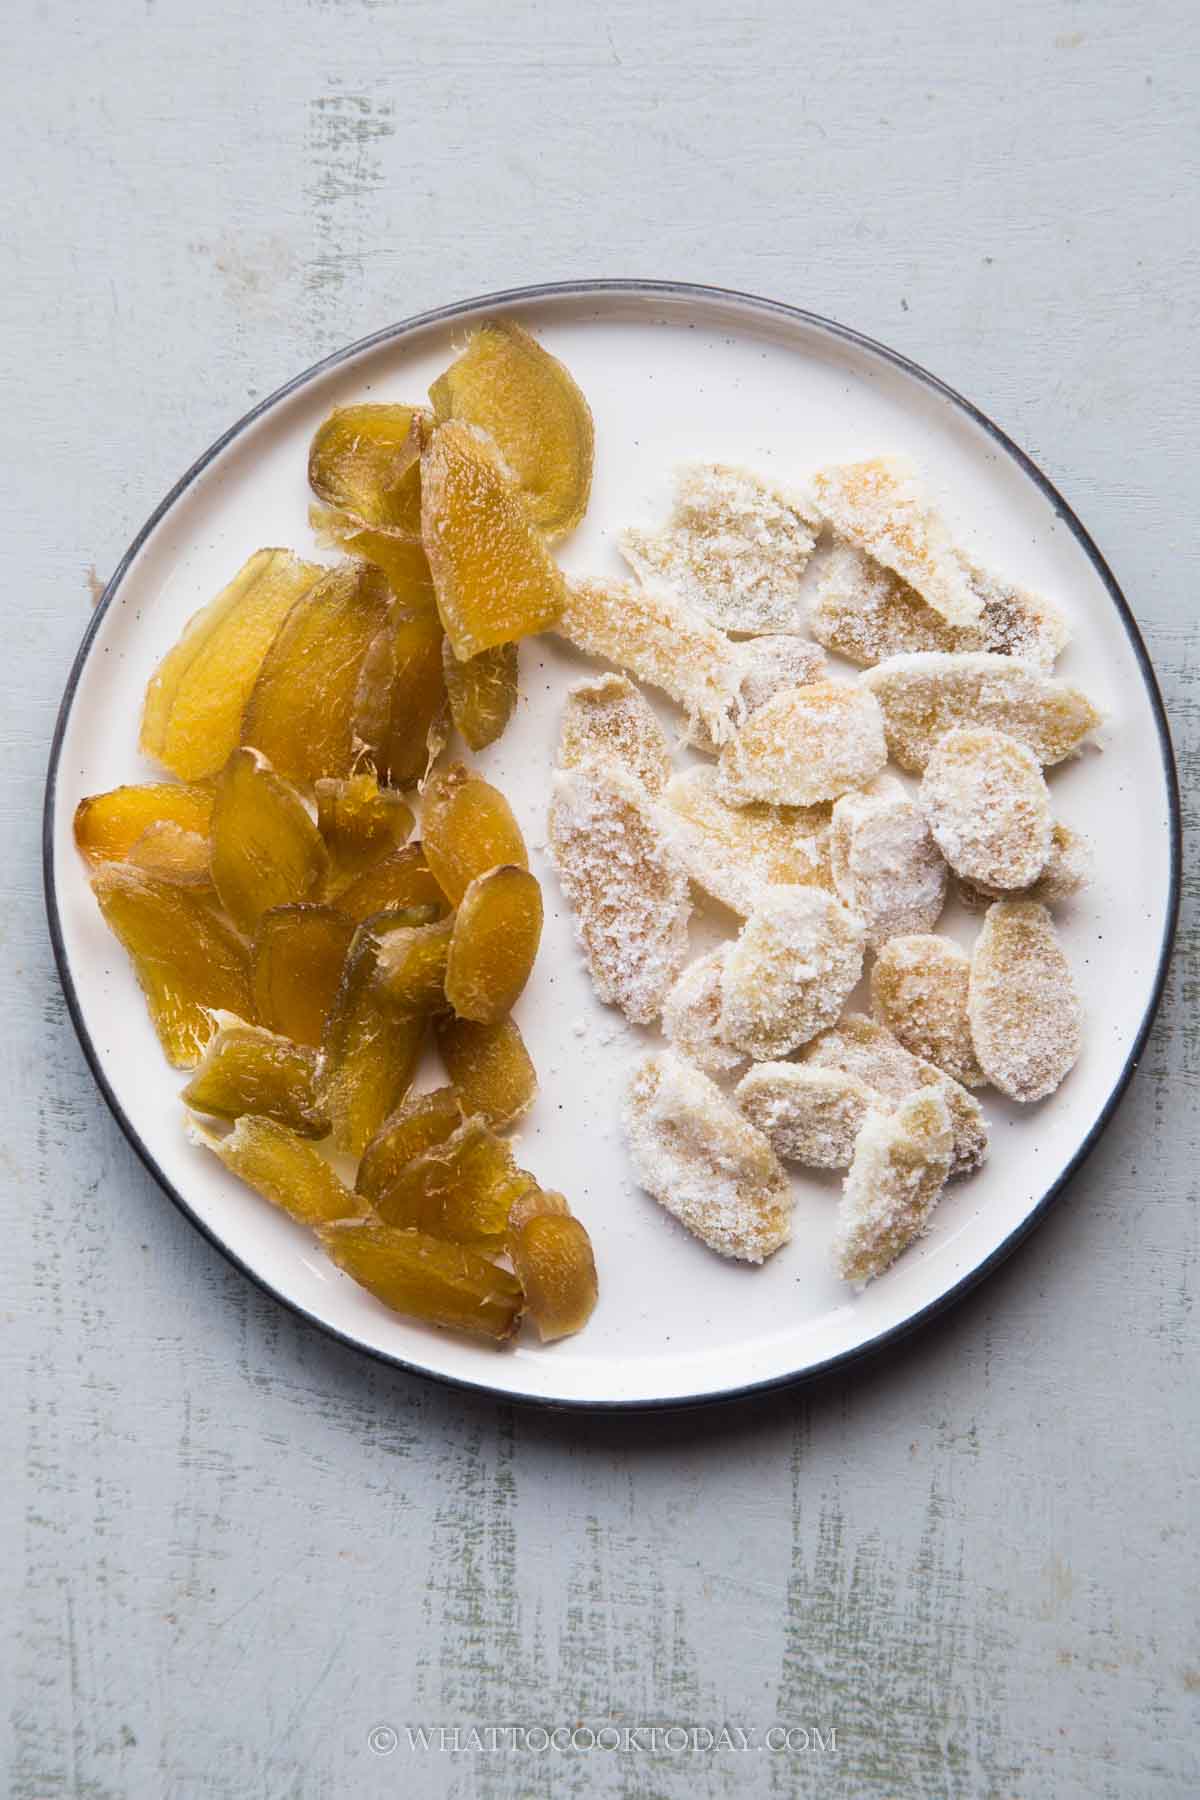
For many home cooks and baking enthusiasts, the terms "candied ginger" and "crystallized ginger" are often used interchangeably, leading to some confusion. While they share a delightful sweet-spicy essence and begin their journey in much the same way, these two ginger confections have distinct finishing touches that set them apart. Understanding this difference is key, especially when you're keen to learn how to make crystallized ginger candied ginger right in your own kitchen. At its core, both candied and crystallized ginger start with fresh ginger root that is blanched to reduce its intense pungency, then simmered in a sugar syrup until tender and translucent. This initial process transforms the fiery root into a sweet, chewy treat. Here’s where the paths diverge:- Candied Ginger: After simmering in the syrup, candied ginger can be enjoyed in two main forms. It can be stored directly within its luscious ginger-infused syrup, creating a moist, intensely flavorful preserve. Alternatively, the ginger pieces can be removed from the syrup and allowed to "dry" on a cooling rack. This drying process leaves the ginger sticky to the touch, with a slightly glossy, syrupy coating that hasn't fully hardened into a crystal. Its texture is soft, chewy, and wonderfully aromatic.
- Crystallized Ginger: Crystallized ginger takes the dried (but still sticky) candied ginger a step further. These pieces are then tossed or rolled in granulated sugar until they are thoroughly coated. The sugar adheres to the sticky surface, creating a sparkling, somewhat crunchy exterior. This extra layer of sugar gives crystallized ginger its signature "sugared" appearance and a slightly firmer bite, while still retaining the chewy tenderness within.
Why Homemade Reigns Supreme: Benefits Beyond Belief
There's an undeniable charm to store-bought ginger confections, but once you discover how to make crystallized ginger candied ginger at home, you'll likely never look back. The advantages of DIY extend far beyond mere cost savings, offering a truly superior product tailored to your exact preferences.Here’s why homemade truly reigns supreme:
- Unparalleled Freshness and Flavor: Store-bought versions, while convenient, often lack the vibrant, piquant zing of freshly prepared ginger. When you make your own, you're guaranteed a fresher, more aromatic, and intensely flavored product that simply can't be matched by mass-produced varieties. The ginger's natural oils and potent essence are preserved, resulting in a more dynamic taste profile.
- Control Over Spiciness: One of the greatest benefits of making your own is the ability to customize the ginger's "heat." The blanching process, where ginger is boiled in plain water before the syrup bath, is crucial for taming its fiery nature. By adjusting the number of times you blanch, or the duration of each blanching, you can achieve a mild, gently warming ginger or a more assertive, spicier kick to suit your palate.
- Customization of Shape and Size: Are you dreaming of delicate slices for tea, robust cubes for snacking, or fine julienned strips for baking? At home, you're the master. You can cut your ginger into any shape or thickness you desire, ensuring it perfectly complements its intended use. This level of customization is rarely available with commercial products. For more on tailoring your creations, check out our guide on Master Candied Ginger: Customize Shape and Spiciness Level.
- Minimal Ingredients, Maximum Impact: You only need two, maybe three, basic ingredients: fresh ginger, sugar, and water. That's it! No strange additives, preservatives, or artificial flavors. This simplicity ensures a clean, pure taste and peace of mind about what you're consuming.
- Delicious Byproducts: The process of making these ginger treats yields delightful bonuses! The water from the initial blanching can be saved to make a soothing ginger tea, perfect for a cold day. The leftover sugar syrup from the candying stage is a fantastic ginger simple syrup, ideal for cocktails, drizzling over desserts, or sweetening beverages. This versatility means you get more value and enjoyment from your efforts. You can learn more about these bonus creations in our article: Homemade Crystallized Ginger: Easy Recipe & Delicious Byproducts.
- Cost-Effective: While fresh ginger and sugar are inexpensive, commercially prepared candied and crystallized ginger can be surprisingly pricey. Making your own is a budget-friendly way to keep a steady supply of this delightful ingredient on hand.
The satisfaction of creating something so delicious and versatile from scratch is incredibly rewarding. It’s a simple process that yields spectacular results, making it well worth the small investment of time.
Choosing Your Ginger: The Root of Success
The journey to perfect homemade candied or crystallized ginger begins with selecting the right foundation: the ginger root itself. The quality and type of ginger you choose will significantly impact the flavor, texture, and ease of preparation.Young vs. Mature Ginger
Ginger comes in various stages of maturity, and each offers distinct characteristics:- Young Ginger: This is often preferred for candied and crystallized ginger due to its tender texture and milder flavor. Young ginger typically has:
- Thinner, smoother skin that's easier to peel, sometimes even just requiring a gentle rub.
- Less fibrous flesh, making it more pleasant to chew.
- A juicier consistency and a slightly less intense, more fragrant spice.
- A lighter, sometimes pinkish hue.
- Mature Ginger: This is the most common type found in grocery stores and works perfectly well, though it requires a bit more effort. Mature ginger has:
- Thicker, tougher skin that is more challenging to peel.
- A more fibrous interior, which can make it tougher to chew if not properly blanched and cooked.
- A stronger, spicier, more pungent flavor.
- A dryer, rougher appearance.
Selecting Quality Roots
Regardless of whether you choose young or mature, always look for ginger roots that are:- Firm and Plump: Avoid ginger that feels soft, mushy, or shriveled. This indicates it's past its prime.
- Smooth-Skinned: While mature ginger naturally has a rougher skin, look for roots without excessive blemishes, mold, or damaged spots.
- Fragrant: A good piece of ginger should have a strong, fresh, aromatic scent when scratched lightly.
- Free of Sprouting: While edible, sprouted ginger can be less potent in flavor.
The Step-by-Step Journey: How to Make Crystallized Ginger and Candied Ginger at Home
Embarking on the process of how to make crystallized ginger candied ginger is a rewarding culinary adventure. It's less daunting than it sounds and involves a few distinct stages that build upon each other.Preparation is Key
A good start ensures a smooth process and a beautiful end product.- Wash and Clean: Begin by thoroughly washing your ginger roots under cold running water. Use a vegetable brush to scrub away any soil or dirt, especially from the nooks and crannies. Pat dry with a paper towel.
- Peeling Techniques:
- The Spoon Method (Recommended for Knobby Ginger): For irregular, knobby ginger, a sturdy metal spoon is your best friend. Hold the spoon with the back facing outward and use the tip to scrape the skin away from you. This method is incredibly effective at navigating the contours without wasting much flesh.
- Vegetable Peeler: For smoother, straighter pieces of ginger, a regular vegetable peeler works just fine.
- Sharp Knife: If you're confident with a knife, you can carefully pare away the skin.
The goal is to remove all the tough outer skin. - Cutting the Ginger: Once peeled, decide on your desired shape and thickness.
- Slices: The most common method. Use a sharp, large knife to cut the ginger into roughly 1/4-inch (0.6 cm) thick rounds or oval slices. For ease and uniformity, a mandoline slicer can be a real time-saver.
- Cubes: For a more substantial, chewy snack, cut slices into small cubes.
- Strips/Julienne: For specific baking needs or garnishes, cut slices into thin strips.
The Blanching Stage (Softening & Taming the Heat)
This crucial step reduces the ginger's intense spiciness and begins to tenderize its fibrous texture, making it more palatable.- First Boil: Place your prepared ginger pieces in a medium saucepan and cover them with cold water. Bring the water to a boil over medium-high heat.
- Simmer and Drain: Once boiling, reduce the heat to a simmer and cook for 10-15 minutes. The longer you boil, the milder the ginger will become. If you prefer a very mild ginger, you can drain this water, refill with fresh cold water, and repeat the blanching process a second time.
- Ginger Tea Byproduct: Don't discard the initial blanching water! This flavorful liquid makes an excellent ginger tea. Just add a squeeze of lemon and a touch of honey or your preferred sweetener. It's a fantastic, soothing drink on a cold day. For more on this, check out our guide on Homemade Crystallized Ginger: Easy Recipe & Delicious Byproducts.
- Drain and Reserve: Drain the ginger well, but hold onto the water if you plan to make ginger tea.
The Candying Stage (Syrup Infusion)
This is where the magic happens, as the ginger slowly absorbs the sugary goodness.- Prepare the Syrup: In the same saucepan (or a clean one), combine equal parts sugar and water. A common ratio is 1 cup of sugar to 1 cup of water for roughly 1 pound of prepared ginger. For a richer syrup, you can use slightly more sugar.
- Add Ginger and Simmer: Add the blanched ginger to the sugar-water mixture. Bring it to a gentle boil, then reduce the heat to a low simmer.
- Cook Until Translucent: Let the ginger simmer in the syrup for approximately 45-60 minutes, or until the ginger pieces become translucent and very tender. The syrup will thicken considerably and reduce by about half. Stir occasionally to prevent sticking.
- Candied Ginger Option 1 (In Syrup): If you want to store your candied ginger in syrup, simply transfer the ginger pieces and the remaining thick syrup into a clean, airtight jar. It will keep for weeks in the refrigerator.
- Candied Ginger Option 2 (Dried Sticky): To make candied ginger that's dry but still sticky, or to prepare for crystallizing, carefully remove the ginger pieces from the syrup using a slotted spoon or tongs. Place them in a single layer on a wire rack set over a baking sheet (to catch drips). Allow them to dry at room temperature for several hours or overnight. They should be firm, chewy, and sticky to the touch. This form is excellent for baking or as a standalone chewy treat. For tips on customizing this further, refer to Master Candied Ginger: Customize Shape and Spiciness Level.
- Ginger Simple Syrup Byproduct: The leftover ginger-infused syrup is a liquid gold! Bottle it up and use it in cocktails, mocktails, coffee, tea, or drizzled over pancakes and ice cream.
The Crystallizing Stage (The Sugar Coat)
This final step transforms sticky candied ginger into sparkling, crystallized treats.- Prepare for Coating: Once your candied ginger pieces are sufficiently dried and sticky (from "Candied Ginger Option 2" above), prepare a shallow plate or bowl with granulated sugar.
- Coat the Ginger: Take a few pieces of the dried candied ginger at a time and toss them gently in the granulated sugar. Ensure they are completely coated on all sides.
- Final Drying: Return the sugar-coated ginger pieces to the wire rack. Let them dry for another few hours at room temperature, or until the sugar coating is no longer sticky. This helps to set the crystals and prevent them from clumping together in storage.
- Storage: Store both candied (dried sticky) and crystallized ginger in airtight containers at room temperature for up to several weeks, or even longer in the refrigerator.
Creative Ways to Enjoy Your Homemade Ginger Treats
Once you've mastered how to make crystallized ginger candied ginger, a world of culinary possibilities opens up! These sweet and spicy gems are incredibly versatile, enhancing everything from simple snacks to gourmet dishes.- Standalone Snacking: Both candied and crystallized ginger make fantastic snacks. My kids, for instance, are particularly fond of the crystallized variety, enjoying the extra sweetness of the sugar coating. Candied ginger, with its chewier texture, is also a delightful pick-me-up.
- Baking Brilliance: Incorporate diced candied or crystallized ginger into your favorite baked goods. They add a wonderful chewy texture and a burst of warm spice to:
- Cookies (especially gingerbread, oatmeal, or shortbread)
- Muffins and Scones
- Cakes and Loaf Breads (like pumpkin or carrot cake)
- Fruit tarts and crumbles
- Granola or energy bars
- Aromatic Additions to Tea: Drop a few slices of candied ginger into your hot tea for an extra layer of warmth and flavor. It's especially soothing during cold weather or when you need a little digestive comfort.
- Savory Dishes and Marinades: Don't limit ginger to sweets! Finely chopped candied ginger can add an unexpected sweet-spicy complexity to savory dishes, such as glazes for ham or chicken, stir-fries, or even some curries. Its sweetness balances salty or umami flavors beautifully.
- Garnishes and Toppings: Crystallized ginger makes a beautiful and edible garnish for desserts, cocktails, or even a cheese board. Chop it finely and sprinkle over yogurt, oatmeal, or ice cream.
- Digestive Aid: Ginger is renowned for its digestive properties. Enjoying a piece of candied or crystallized ginger after a meal can help settle your stomach and aid in digestion.
- Homemade Gifts: Pack your homemade ginger treats into pretty jars or bags for a thoughtful and delicious edible gift during the holidays or any time of year.
